
Your graphics add a nice touch to my presentations and I recently used them for one of my all-hands meetings. Your toolbox adds professionalism to my slides. Instead of using standard clipart.
Claude Jones, Director of Engineer, @Walmartlabs, USA

Your graphics add a nice touch to my presentations and I recently used them for one of my all-hands meetings. Your toolbox adds professionalism to my slides. Instead of using standard clipart.
Claude Jones, Director of Engineer, @Walmartlabs, USA
I needed a fresh look at some of my slides. I've tried to find a way to create a paintbrush effect, to underline, accentuate, add some color and the handwritten markers were just the things. Very easy to use, easy to size, change the color. It was an affordable, perfect solution and I'm happy to recommend it.
Anonymous, US
The crisp, clean look of the graphics, and the fact that it allowed me to easily edit and change the colors to match the template was my main reason for purchasing them.
Brandie Jenkins, E-learning Developer, USA
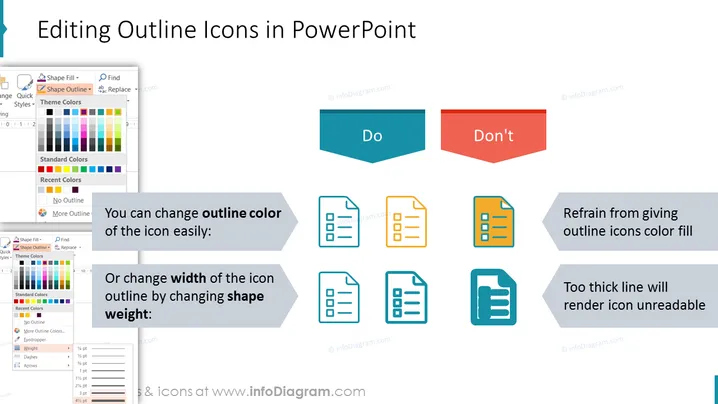
La diapositive présente des directives sur la manière d'éditer correctement les icônes de contour dans PowerPoint pour maintenir la clarté et la lisibilité. Elle conseille qu'on peut facilement changer la couleur de contour de l'icône ou ajuster la largeur du contour de l'icône en modifiant le poids de la forme. En revanche, elle recommande de ne pas remplir les icônes de contour avec de la couleur ou d'utiliser des lignes trop épaisses, car ces pratiques peuvent rendre les icônes difficiles à lire. Chaque point est illustré par des exemples picturaux montrant les méthodes préférées et déconseillées.